One campaign, one offer, three completely different audiences in three different countries. Send all of them to the same page and someone’s conversion rate takes the hit.
Landing pages in Trackier solve this without forcing you to spin up a new campaign for every GEO, segment, or test variant. This guide covers what a landing page is inside Trackier, why you’d want more than one on a single campaign, and how to set them up, whether that’s adding a single URL, importing a hundred at once, or splitting traffic across locations.
What Is a Landing Page in Trackier?
A landing page is the destination a user reaches after clicking a tracking link. It’s built to drive one specific action: an install, a signup, a purchase, a registration.
Trackier lets you attach a single landing page to a campaign or several. When you add more than one, publishers can choose which URL to send traffic to right from the tracking link card on their panel.
You can also attach a pre-landing page, a page that sits before the main landing page and filters or qualifies traffic by country, city, ISP, or region, so only the right users reach the offer.
Why Add Multiple Landing Pages to a Campaign?
Adding multiple landing pages inside one campaign gives you room to run more without creating more. It supports:
- A/B testing different page designs or offers to see which converts better
- Different payouts assigned per landing page
- GEO or audience-specific targeting within the same campaign
- Multiple user flows running side by side
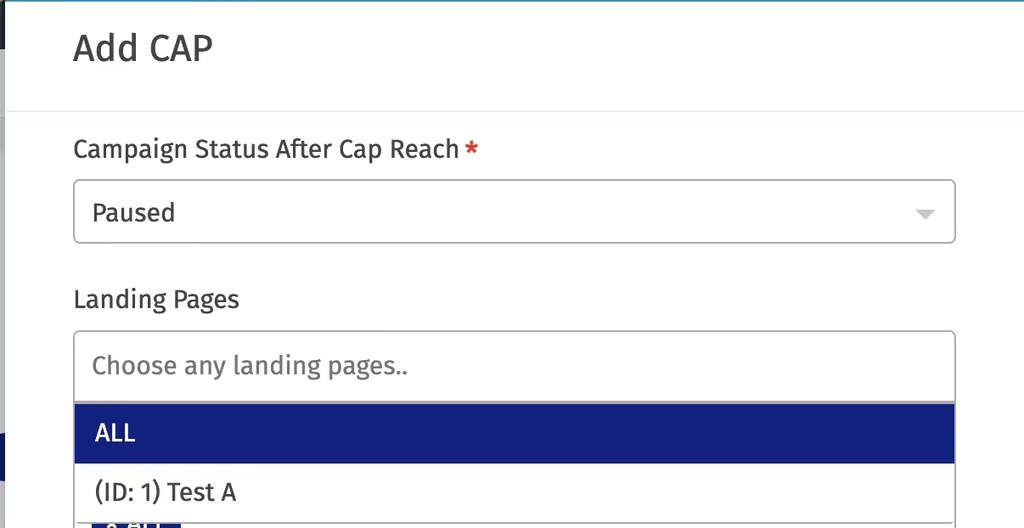
- Separate CAPs set on each landing page, or one CAP shared across all of them
Instead of duplicating a campaign for every variant, you manage all your landing pages in one place. This is especially useful when you’re running the same campaign in one country but need to speak to different user segments differently.
What You Would Require Before Starting
Before you add landing pages in Trackier, have these ready:
- The destination URL for each page, provided by your advertiser
- A preview URL for each page
- A decision on single entry or bulk import. Bulk needs a CSV matching Trackier’s required fields
- Any targeting conditions you want applied (country, region, city, ISP, or time zone)
Action 1: Add a Single Landing Page
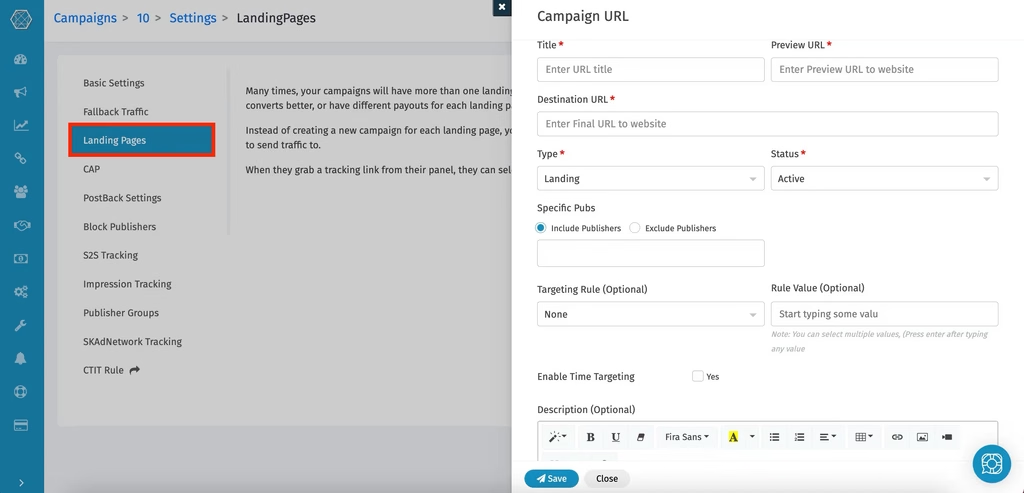
Go to the campaign’s settings and open the “Landing Pages” tab.
Click +Add New and fill in:
- Title: name for the landing page
- Preview URL: the preview link
- Destination URL: the final URL from your advertiser
- Type: landing page or pre-landing page
- Status: Active or Paused
- Specific Pubs: include or exclude select publishers
- Targeting Rule: country, region, city, or ISP
- Rule Value: the specific location or ISP name
- Time Targeting: a time zone window, if needed
- Description: an internal note
Trackier validates the URL as you enter it. A malformed link throws an error before it ever goes live.
Action 2: Import Landing Pages in Bulk
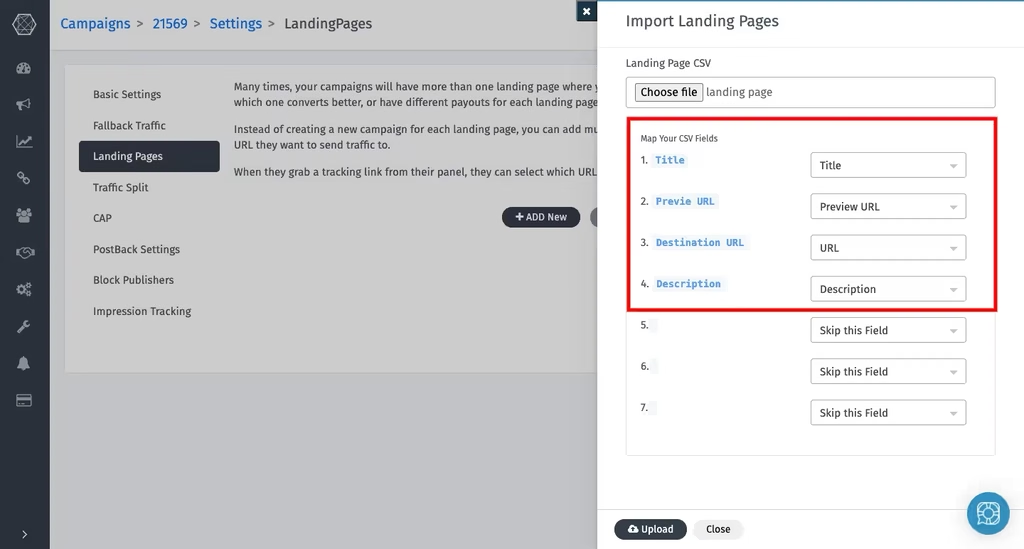
Running more pages than you want to add one by one?
Click Import Landing Pages and upload a CSV with these fields:
| Field | Required? |
| url | Required |
| preview_url | Required |
| title | Required |
| description | Optional |
| iurl (Impression URL) | Optional |
| lp_id (Landing Page ID) | Optional |
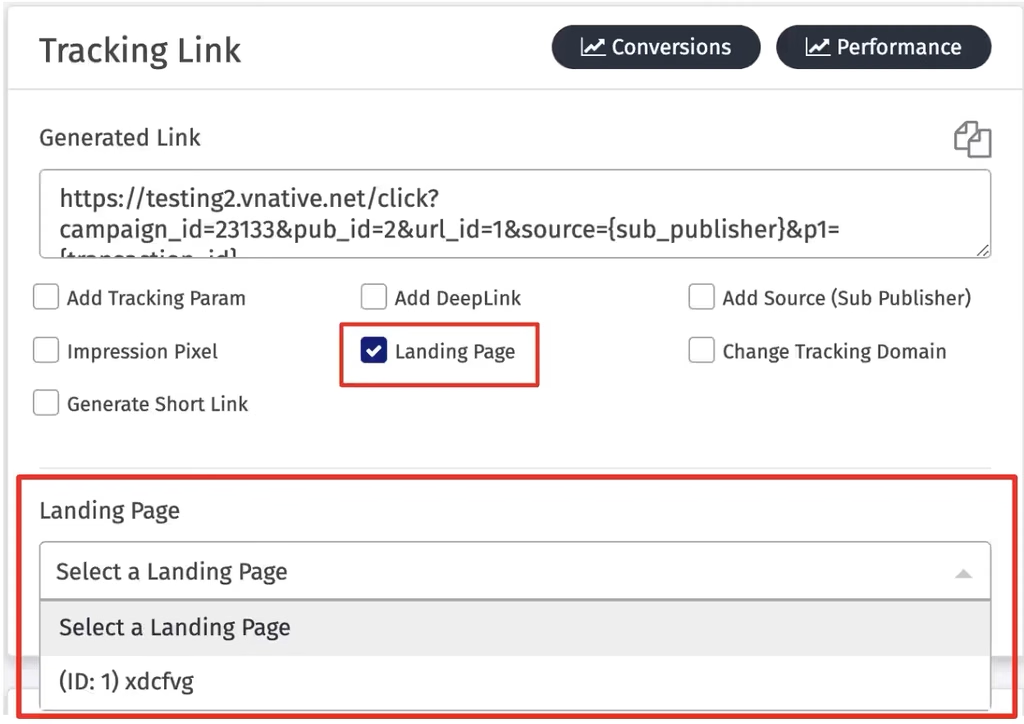
Action 3: Add a Landing Page to Your Tracking URL
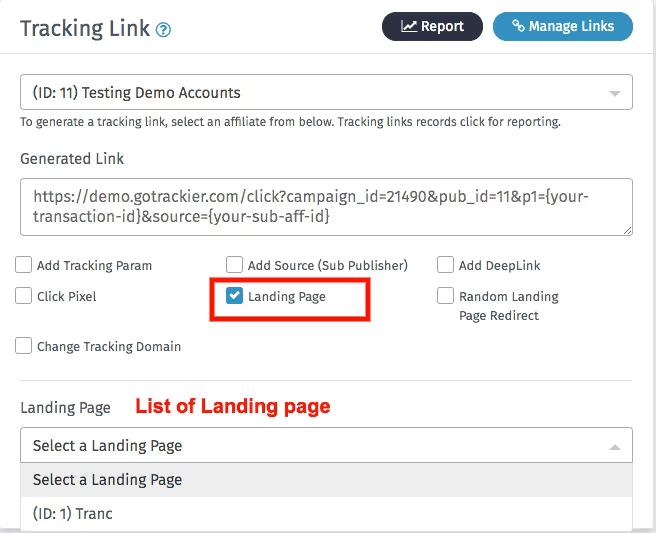
Promoting just one landing page? Append it directly to the tracking URL.
If a landing page already has location-based targeting set, you don’t even need to do this. A plain tracking link will automatically route the user to the right page based on where they are.
Where to Find Landing Page Data in Reports
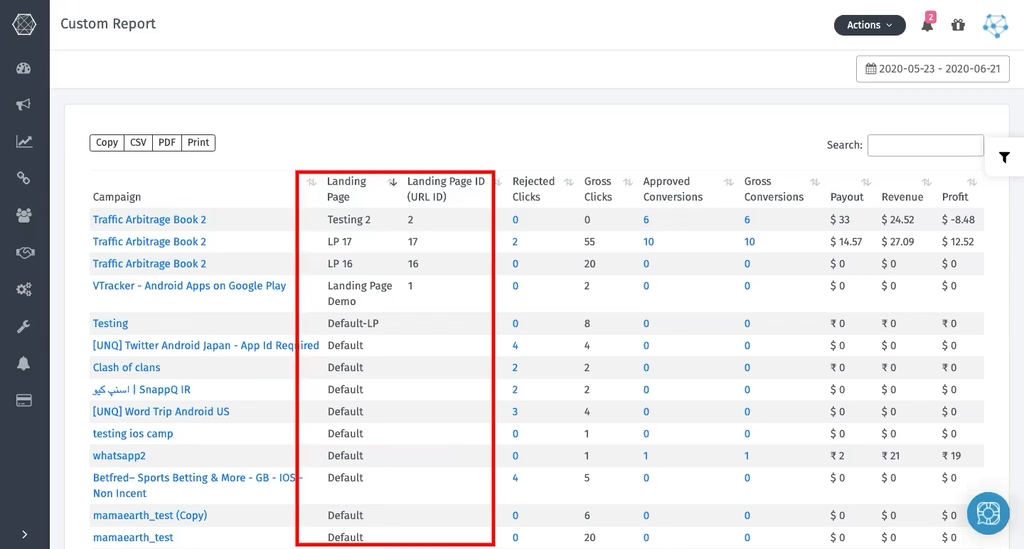
Head to the campaign or publisher report and select the landing page filter. This breaks down performance by page, so you can see which URL is actually converting instead of guessing.
Pro Tip: Splitting Traffic Across Multiple Locations
Running the same campaign across several locations and want traffic split across landing pages within each one?
Two moves:
- In the campaign’s targeting card, add a rule block for each location. Under advanced options, set the Rule Block Condition to OR.
- In the campaign’s settings card, open the landing page section, set the Type to the targeting block you just created, and add your landing pages with split percentages enabled.
Trackier handles the routing from there, sending each slice of traffic to the right page based on the split you set.
Need Help?
If you run into any issues while setting up landing pages in Trackier, whether it’s a bulk import that won’t validate or a split that isn’t distributing correctly, our support team is available via the in-platform chat or at support@trackier.com. We’ll help you get your pages live and tracking correctly.
FAQs
What is a landing page in Trackier, and why would I add more than one to a campaign?
A landing page is the destination page a tracking link sends users to.
Adding more than one to a campaign lets you A/B test, assign different payouts, target different GEOs or segments, and manage separate CAPs, all without creating a new campaign for each variant.
How do I add multiple landing pages to a Trackier campaign?
Go to the campaign’s settings, open the Landing Pages tab, and click +Add New to add pages one at a time, or use Import Landing Pages to upload a CSV for bulk entry.
Can I control which landing page a publisher’s traffic goes to?
Yes. You can append a specific url_id to the tracking link to route traffic to one page, or set location-based targeting on a landing page so a plain tracking link automatically sends users to the right page for their region.
Can I check which landing page is performing best?
Yes. Go to the campaign or publisher report, apply the landing page filter, and compare performance across each URL.
