If you run a network on Trackier, the Network API is what lets you step outside the panel and connect Trackier directly to your own tools, CRMs, internal dashboards, reporting pipelines, or automation scripts. Instead of logging in manually to check a conversion, pull a report, or update a status, you can do it programmatically.
This guide walks through everything you need to get your first request running, plus a look at the endpoints available today, including a few that didn’t exist when this article was first published.
Requirements for Accessing the Trackier Network API
Before you start, make sure you have the following:
- Your network must be on the Enterprise pricing plan or a Dedicated solution, the Network API isn’t available on lower-tier plans.
- Every network needs an API key, a randomly generated string unique to your account.
- The IP address making the request must be whitelisted for API access.
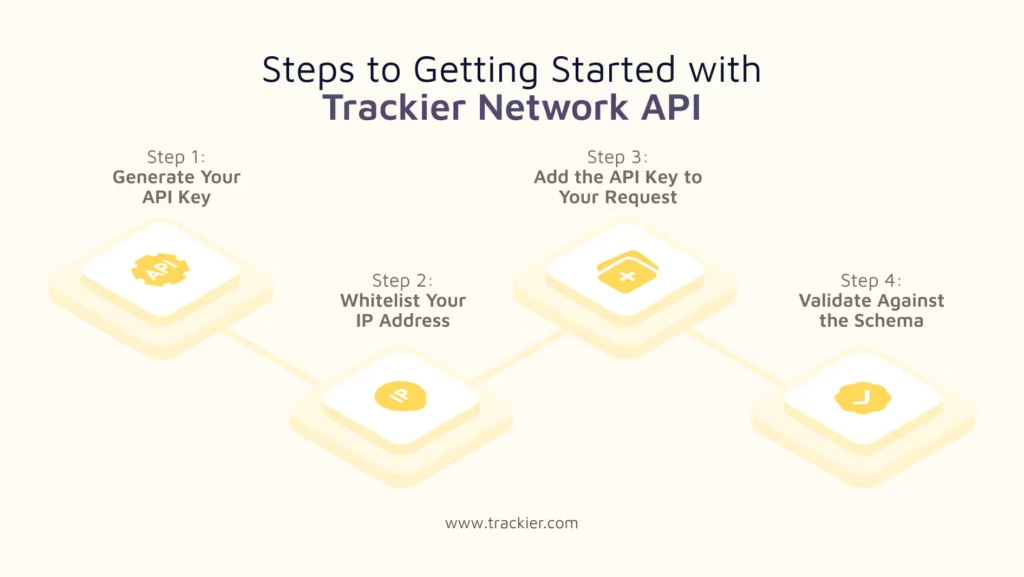
Step 1: Generate Your API Key
Note: This is one thing that’s changed since we first covered this, the API key now lives under Automation, not the old Network settings menu.
- Log into your Trackier panel and go to Automation.
- Scroll down to the API section.
- Your API key will be displayed here. Copy it and store it securely, you can also ask your Account Manager to generate or retrieve it for you.
Step 2: Whitelist Your IP Address
API requests only go through if they come from an approved IP.
- In the same API section, you’ll find an IP whitelist field just below your API key.
- Enter the IP address you want to whitelist and save.
- Need to add more later? You can also submit additional IPs programmatically, once your first one is whitelisted.
Making a Request
Every request to the Network API needs your API key passed as an HTTP header:
X-API-Key: YOUR_API_KEY
Without a valid key in this header, the request will be rejected — so this is worth double-checking first if you run into an authentication error.
Rate Limiting
Networks are limited to 50 API calls every 10 seconds. If your integration needs a higher limit, reach out to your Account Manager to discuss options.
Explore the Network API Endpoints
The full endpoint reference lives in the Trackier Network API Docs, organized by category. Here’s a look at what’s available under the Network section, which covers a lot of ground beyond the basics:
| Endpoint | Method | What it’s for |
| Basic Login Endpoint | POST | Authenticate and generate a session programmatically, useful for integrations that shouldn’t rely on manually logging into the panel. |
| Get Notifications | GET | Pull your network’s panel notifications into an external tool instead of checking them manually. |
| Pixel Logs | GET | Retrieve pixel firing logs to debug tracking issues without digging through the UI. |
| Debug Postback Logs | GET | Access postback debug logs to troubleshoot server-to-server conversion tracking issues. |
| Bulk Conversion Upload | POST | Upload multiple conversions in a single request instead of adding them one at a time. |
| Conversion Status Change | POST | Update the status of a conversion (e.g., approved, rejected, pending) via API. |
| Find All Jobs | GET | List background jobs — handy for tracking the status of async operations like a bulk upload. |
| Find Job By ID | GET | Check the status of a specific job by its ID. |
| Send Emails Via SMTP Service | POST | Trigger emails through your connected SMTP service directly from your integration. |
Beyond the Network section, the broader Admin API documentation also covers Campaigns, Publishers, Advertisers, Reports, Categories, Coupon Codes, and Incentive Offers. So if you’re building something more end-to-end, it’s worth browsing the full docs.
Validate Your Integration with Schemas
One addition since this article first went live: Schemas. Each endpoint in the docs now includes a schema you can use to verify that the response you’re getting back matches what’s expected – a quick way to confirm your integration is actually working correctly, rather than just returning a 200 and hoping for the best.
Example: Authenticating with the Basic Login Endpoint
Step 1: Get your API key from the Automation > API section.
Step 2: Open the API documentation and select Basic Login Endpoint under Network.
Step 3: Add your API key as the X-API-Key header and send the request.
Step 4: Verify the response against the endpoint’s schema to confirm your integration is set up correctly.
From here, the same pattern, API key in the header, request to the relevant endpoint, response checked against its schema, applies across every endpoint in the Network category.
Conclusion
The Network API turns Trackier from a panel you log into a system you can build on top of, automated conversion uploads, real-time status updates, custom dashboards pulling live data, all without manual intervention. Generate your key, whitelist your IP, and you’re ready to start building. And if you’d rather see what Trackier can do before diving into the API, you can always start a free trial or request a demo with our team.
Need Help?
If you run into any issues while generating your API key, whitelisting your IP, or working through the Network API endpoints, Trackier’s support team is available via the in-platform chat or at support@trackier.com. We will make sure your integration is set up correctly and running without interruptions.
FAQs
What plan do I need to access the Network API?
Your network needs to be on the Enterprise plan or a Dedicated solution.
How do I authenticate my requests?
Pass your API key as the “X-API-Key” header on every request. The Basic Login Endpoint is available separately if your integration needs to generate a session programmatically.
What happens if I exceed the rate limit?
Requests beyond 50 calls per 10 seconds may be throttled. If that’s not enough for your use case, talk to your Account Manager about raising the limit.
Where do I go if I run into issues?
Reach out to support@trackier.com or use the in-platform chat, the team can help with everything from key generation to debugging a failed request.
