The integration of an advertiser’s server postback is of paramount importance in tracking the essential performance marketing macros during the execution of a campaign. It serves as a direct communication channel between your tracking platform and the advertiser’s server, enabling the seamless flow of conversion data. This not only ensures precise attribution but also empowers marketers to optimize campaigns based on real-time performance insights.
Server postback (also known as server-to-server or S2S tracking) is a more secure and reliable method of tracking compared to client-side pixels, especially when dealing with mobile apps, third-party cookies, or stringent browser privacy policies. With server postback integration, every time a conversion occurs, the advertiser’s server pings the Trackier platform with conversion details via a URL containing dynamically populated macros and parameters. These macros capture essential campaign data such as click ID, source, offer ID, and other performance indicators.
Important Points To Note:
- Users can track the conversions through either global level postback or advertiser level postback. Both of the types of tracking methods have their own use cases.
- Global level postback is predominantly used while integrating with mobile marketing platforms such as Trackier MMP
Steps to follow for Advertiser Level & Global Level integration
Follow the steps below to find the Advertiser Level & Global Level respectively. After that, the steps to integrate with the Advertisers are mentioned.
Step 1
Where to find Advertiser Postback?
- First, go to the Advertiser Manage Section, there you can select any particular advertiser for which you want the postback URL and then find the same at the right side of the Page.
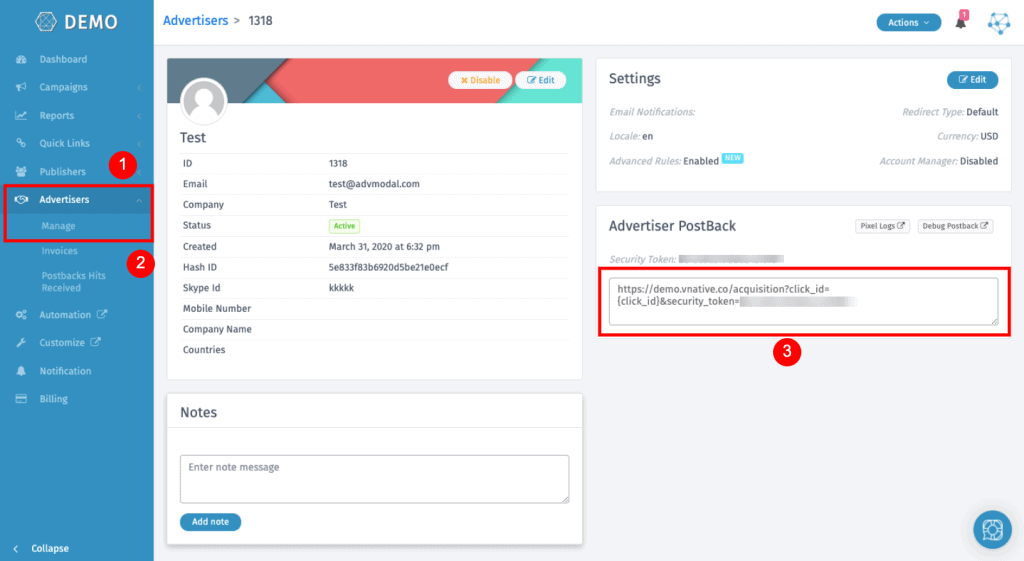
- Second, select any of the campaigns where you can find a card of Conversion Tracking. In there you will find the Advertiser Postback as well.
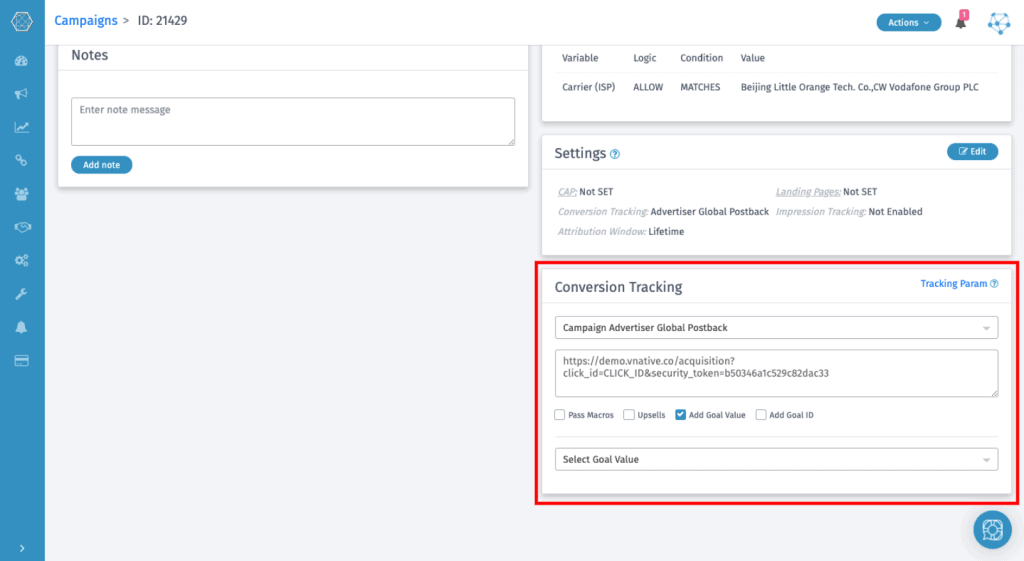
You can easily fetch the postback URL from any place you find convenient.
Important To Note: You can check out the list of the parameters which can be tracked using the Advertiser Postback here.
Step 2:
Campaign Setup
Before setting up a campaign you need to add an Advertiser on your panel. To know how to add an Advertiser on your panel check out our article.
- Create a campaign
- Setup a goal for the campaign as per the information provided by the advertiser.
Important To Note: Goals can only be created based on the information provided by you & your advertiser.
Step 3
Creating Default & Goal Postback URL
The default goal value or conversion value can be anything for your campaign. It totally depends on the kind of campaign you are running. It can Install, Registration, Purchase, etc. Let’s take an example below.
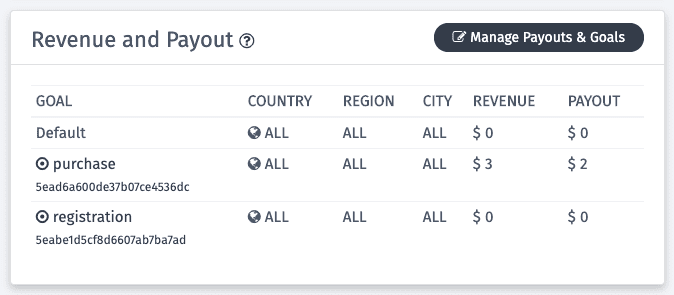
Important To Note: Let’s say you are running an install type campaign or a CPI campaign, the primary events or attributions you would like to trak would be:
- Install (default)
- Registration
- Purchase
The Default Postback Would be:
The postback without any goal value will be your default postback.
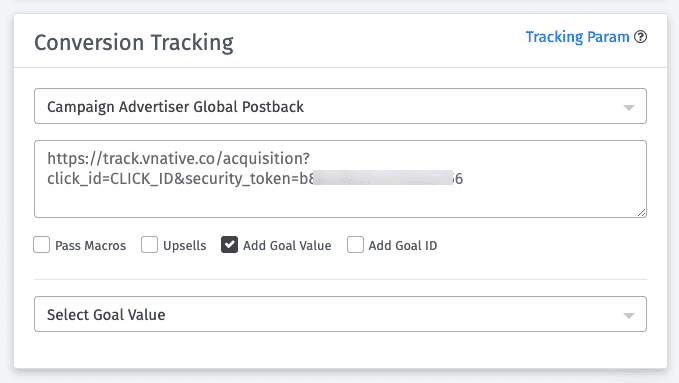
The Postback With A Goal:
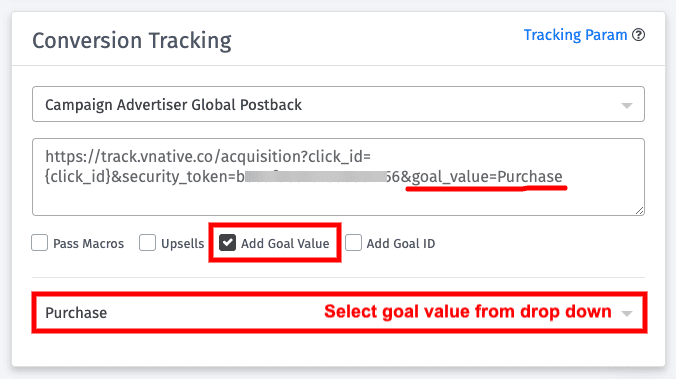
Steps to follow:
- Select the checkbox Goal value.
- Select the goal value, that you had created.
- Once you have selected it will get implemented in postback as &goal_value=Purchase.
Similarly you can create multiple event postbacks & share it with the advertisers based on the conversions you want to track.
Important To Note:
Here list of all Parameters that can use in postback to get the information from the advertiser.
- sale_amount
- revenue
- txn_id
- sub1-sub10
- status
Step 4
Testing & Troubleshooting the Postback
- Share the Default and event Postback with your advertiser and make sure they replace the required macro with their Macro, you can get an example here.
- Share the Testing Link with Advertiser so that they can run a system postback test.
- Check Logs if you get conversion after the test run by the advertiser
- If you didn’t receive the conversion, check Postback Hit received from advertisers and use Troubleshooting.
Incase of any queries checkout our article or reach out to us at support@trackier.com.