Google Tag Manager is primarily used to add pixels on different web pages to track & measure various events & activities happening on the page plus understand customer behaviour & how they interact with the overall product. The Google Tag Manager provides a central code snippet that you use to track & measure user behaviour.
The Basic Use Case Of Google Tag Manager
In our industry, the Google Tag Manager is predominantly used by the Advertiser to add the pixels of their partner affiliates, agencies, or publishers in order to track the behaviour, activities & events of the traffic sent in by the partners.
Benefits Of Using Google Tag Manager
Google Tag Manager is mostly used by the marketing departments of the organisations to manage their tracking scripts without having to rely on Tech departments.
- Quick deployment of tracking codes
- Easy to manage all your tags in one place
- Get access to built in & third party testing tools
- Effortless user permission management
- Container templates can be reused
And the biggest benefit of the Google Tag Manager is that the marketers don’t have to rely on the IT team to manage their tracking scripts.
Before adding your tracking pixel on the advertiser’s website via Google Tag Manager, make sure you have white-labeled the tracking domains. If you need any help regarding this, please checkout this article. Also, before starting you need to be ready with Pixel for default & goal, you can look into this article to learn how to generate pixel for Default and Goal.
Steps To Add A Pixel Using Google Tag Manager
After you have shared the pixel with your Advertisers, they can follow these steps
Step 1
Open Tag Manager Account with which you have integrated your website and there you will find an option for tag

Step 2
After opening Tags in your account, a side drawer will open Up there click on edit Icon on “Tag Configuration”.

Step 3
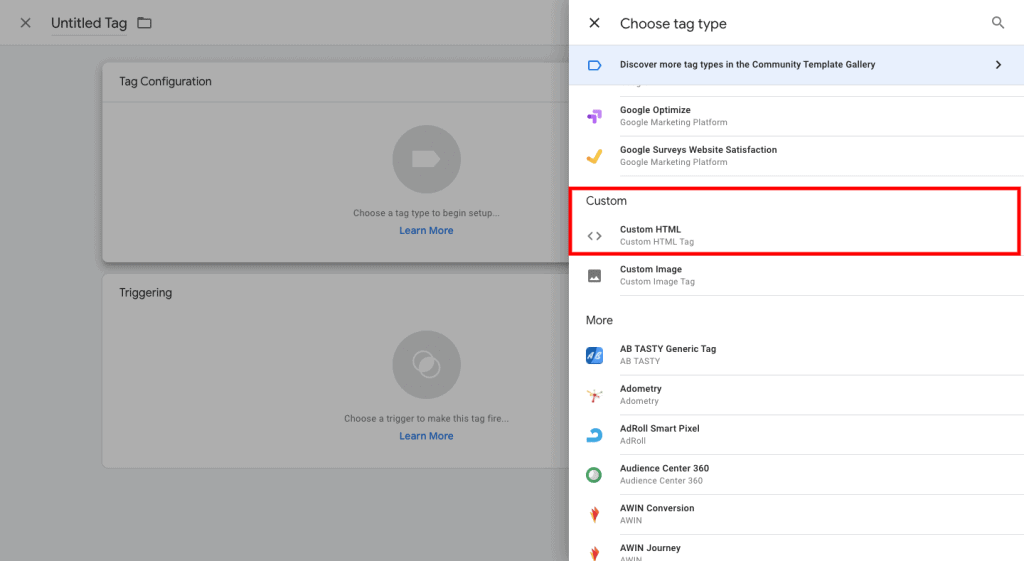
After clicking on Edit, a side drawer will open up there scroll down and select “Custom HTML”

Step 4
In the HTML box place the Trackier iframe/image Pixel, Now an important part is to define where this code should trigger so that needs to be defined in the “Triggering” section.
In the same way Add multiple pixels for different Goals you want to track and select the Trigger as per need.
Please Note: Pixel needs to be placed on Thank you page inside the <body> tag. Thank you page will be the page which pop up when user fill up lead form, or made the purchase.

Step 5
After adding tracking pixel, the final step is to apply the changes & make the changes live, click on the “Submit” button and after some time pixel is added then you can do the Pixel test.

After you are done with the steps mentioned above, you are good to go with your Google Tag Manager & tracking your marketing performance on Trackier. If you need any more information regarding this, please checkout this article.


